Learning how to clean food canisters safely comes down to one part you probably never think about: the rubber ring under the lid. The jar gets scrubbed because you can see the flour dust and the tomato stain. The gasket stays put, holds the ghost of last month's cumin, and quietly stops sealing. I have retired more containers over a tired seal than over a cracked body, and almost every one of those failures started with a wash routine that was too rough on the wrong part.
Most food canisters buying advice stops at the word airtight, which is the easy half. The other half is the twenty minutes after the flour runs out: the order you take the lid apart, how warm the water is, how long the bamboo sits wet. Get that right and a container keeps its airtight seal for years. Get it wrong and you will be buying lids, or whole sets, on a schedule that has nothing to do with how well they were made.
The two containers below are what I would put on my own counter. The eight steps after them are the routine I use in a kitchen with 42 square feet of counter and a family of four who leave the flour lid off.
Why you should trust me
I spent nine years as a test-kitchen manager for a regional grocery chain, which meant I owned the pantry, the labels, and the wash station, and I answered to an inspector who did not accept "it looks clean." A decade of writing equipment reviews since then has been mostly about the parts a listing does not photograph: the thickness of a pan, the hinge on a lid, the gasket nobody mentions. Most food canister reviews spend their words on how a container looks on a shelf; the useful ones talk about whether the seal comes out for washing.
I cook for four in a converted garage with 42 square feet of counter, so every container has to earn its footprint. One that traps odor or loses its seal gets retired fast. I do not call anything dishwasher safe unless the maker says so, and I do not quote a price I have not verified on the day you read this.
How I picked and how I tested
I picked on four things a listing can actually answer. First, can the lid gasket come out? A ring you cannot remove is a ring you cannot clean, and that single detail decides more purchases for me than material or color. Second, does the body hold odor? Glass and metal do not; most plastics eventually do. Third, how many parts are there to wash? A set of 24 spice jars means 24 lids, 24 gaskets, and 24 shaker caps, and that arithmetic matters on a Sunday night. Fourth, does the listing tell me anything measurable, or is it all "premium quality"?
These are also the food canisters setup tips I would give a friend: buy fewer containers than you think you need, buy ones that come apart, and buy shapes that stack. Stackability is not a luxury in a small kitchen. It is the difference between a pantry you can use and a shelf you have to unload to find the rice.
My test protocol for any canister is boring and repeatable. Fill it with flour, seal it, turn it upside down for an hour, and look for a dust line at the rim. Put a spoon of ground cumin inside, close it, leave it three days, then wash it and smell the gasket. Wash the body in warm water with a drop of dish soap, dry it the way the maker says, and time how long the lid takes to dry on a rack. Learning to clean food canisters safely is mostly a test of disassembly, and that is the first thing I check on any new container.
The two sets below are the ones I would buy for my own counter; the routine in this article is the one I would run on them.
If you are still choosing rather than cleaning, my guide to airtight food storage containers covers the buying side in more detail than I can fit here.
The two canisters I would put on my counter
One is for spices, one is for the big dry goods. Both come apart far enough to clean, which is the only reason they are here.
Our pick: SAVVY & SORTED Glass Spice Jars with Label, 24PK Bamboo Jar Spices Set 4oz, 374 Spice Labels, Pepper Grinder, Empty Herb Seasoning Containers, Funnel and Shaker Lids
Our pick
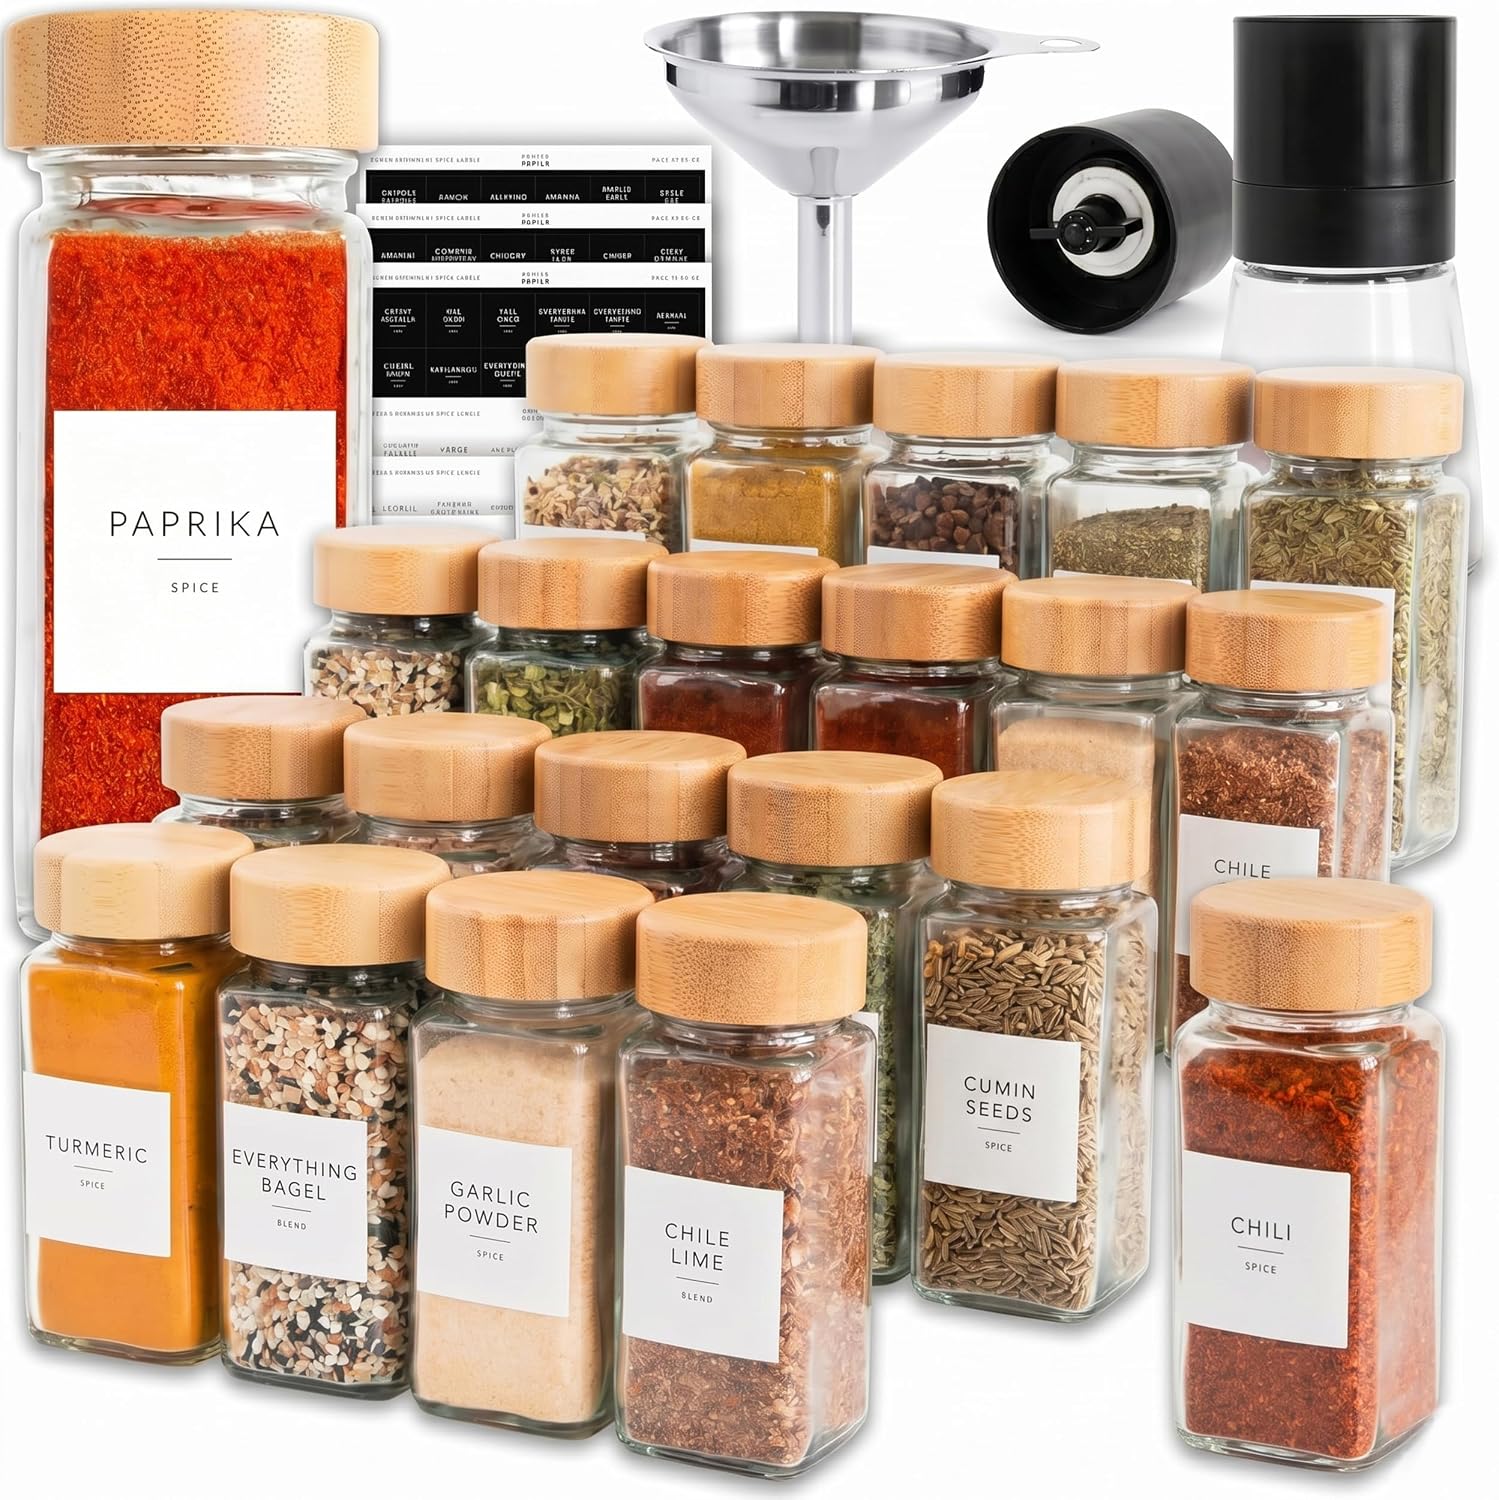
SAVVY & SORTED Glass Spice Jars with Label, 24PK Bamboo Jar Spices Set 4oz, 374 Spice Labels, Pepper Grinder, Empty Herb Seasoning Containers, Funnel and Shaker Lids
Check current Amazon price.
This is a 24-piece spice setup: 4-ounce glass jars with bamboo lids, a set of shaker lids, a funnel, a pepper grinder, and 374 labels. For cleaning purposes the important fact is that the body is glass. Glass does not pick up the smell of cumin or garlic, it does not stain from turmeric the way plastic does, and it shows you when the inside is finally dry. The bamboo lids are the opposite: wood and warm water are not friends, so those get wiped and dried right away rather than left in a rack overnight.
The shaker caps are the parts that clog. Garlic powder plus steam from a hot pan turns into concrete in the holes, so pull the caps off and rinse them the same day, not next month. The funnel is worth keeping in the drawer for refills, because it keeps you from overfilling a jar and packing powder into the rim where the gasket sits.
The honest cost of 24 jars is 24 lids. If you decant a whole spice drawer at once, wash in two batches and let the first set dry completely before you refill it. Wipe the glass before you apply a label, and keep labeled jars out of a long soak so the adhesive does not lift.
Flaws but not dealbreakers: the lid count is the real work here, and bamboo rewards a household that dries things promptly. If your dish rack is a pile, this set will test you. A jar that goes back together damp will smell like the cabinet in a week.
For anyone decanting a spice cabinet once and labeling it properly, this is the set that makes the job look deliberate.
Budget pick: Kitchen Canisters, Airtight Canister Sets for Kitchen Counter, Kitchen Canisters for Countertop Set of 4, Coffee Tea Sugar Flour Spice Tin Jars Food Storage Container with Lid(Black)
Budget pick
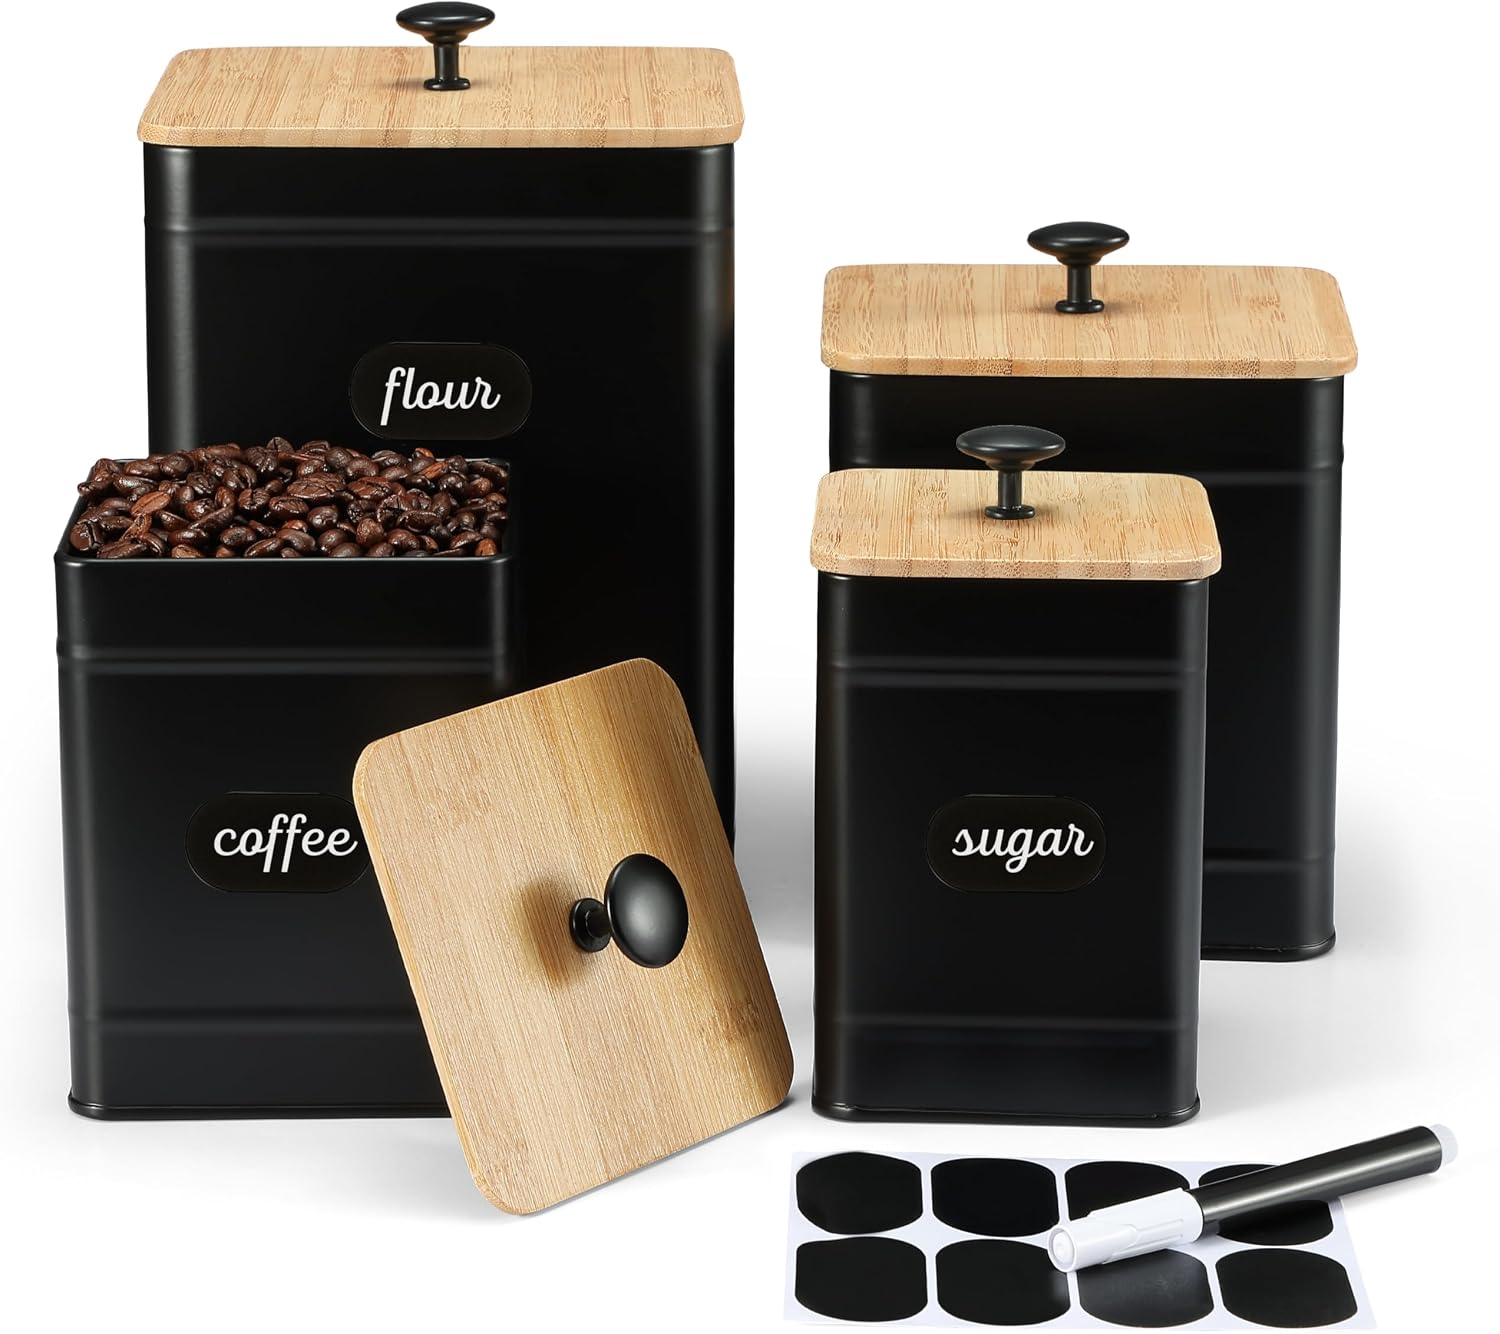
Kitchen Canisters, Airtight Canister Sets for Kitchen Counter, Kitchen Canisters for Countertop Set of 4, Coffee Tea Sugar Flour Spice Tin Jars Food Storage Container with Lid(Black)
Check current Amazon price.
Four tin canisters with lids, finished in black, intended for coffee, tea, sugar, flour, and spice. Metal is the easy material to live with: it does not hold odor, it does not care about turmeric, and it wipes dry in seconds. It also hides the contents, which is good if you dislike clutter and mildly annoying if you are the person who needs to see the flour level before a baking project.
The cleaning job on a tin is about water, not food. Seams, rolled rims, and the underside of the lid trap water and hold it, and a black finish shows every water spot and every scratch. Never soak one. Wash with a soft sponge, warm water, a drop of soap, rinse fast, and dry the rim with a towel rather than leaving it inverted on a rack.
The airtight seal on a canister like this lives in the lid, either a silicone gasket or a friction fit, so keep that dry between uses. Do not clamp a damp lid down on a damp body and walk away; that is how a canister starts to smell like a basement. These are the right shape for portion control on dry goods, one canister each for flour, sugar, rice, and coffee, and they stack without much wasted air between them.
Flaws but not dealbreakers: no window, so you will open the lid to check the level, and a black finish is honest about fingerprints. A dent in a tin is permanent in a way a chip in glass is not.
For a counter where the big bags live and the look matters, this is the sensible four.
How to clean food canisters safely, step by step
This works on glass, tin, bamboo, and plastic. The one thing it assumes is that your lids come apart. If they do not, clean what you can reach and plan to replace the container.
Step one: Empty it and be honest about the contents. Pour the flour or spice into a bowl, look at it, smell it, and check the date you wrote on the jar. Anything clumped, faded, or smelling like the cabinet rather than the ingredient goes out. Do not top off an old jar with a new bag; that is how you carry stale flour forward for a year.
Step two: Take the lid all the way apart. Lid off, gasket out, shaker cap off, grinder separated, funnel out of the drawer. A gasket left in place gets a wipe on the top surface and nothing else, and the underside is where the smell lives. If a gasket is glued in, note it, because that is a buying mistake you will not repeat.
Step three: Brush it dry before you wet it. Flour plus water is paste, and paste in a square corner is a scrubbing job. Knock the dry contents into the bin, then brush the corners and the threads with a dry pastry brush or a paper towel. Thirty seconds here saves five minutes later.
Step four: Warm water, mild soap, and a short soak at most. Fill the sink with warm water and a drop of dish soap. Glass bodies can sit for ten or fifteen minutes. Tin, bamboo, and anything with a wooden lid should never be submerged; wash those with a damp sponge and rinse fast. Hot water is harder on silicone gaskets and on wood than warm water is, and there is no prize for scalding a jar.
Step five: Wash the gasket in its own bowl. This is the part that decides whether the canister stays airtight. Put the rings in a small bowl of warm soapy water, work the inside of each ring with your thumb, and use a paste of baking soda and water on any that smell of garlic or curry. Rinse until the water runs clear. Then flex each ring and look for cracks, stretches, or a white haze. A gasket that has lost its shape will not seal no matter how clean it is.
Step six: Rinse twice and dry completely. One rinse leaves soap film, and soap film tastes like soap the next time you fill the jar with sugar. Rinse in clean water, then stand glass and tin upside down on a rack with the lids off and the gaskets out. Bamboo lids get a towel, not a rack, and should be bone dry before they go back on. Give a glass jar a full air-dry day before you seal it; moisture trapped under a lid is the start of every smell you are trying to avoid.
Step seven: Deal with the smell before you refill. If a jar still smells after washing, put two tablespoons of baking soda in it, close it, leave it overnight, then rinse. Crumpled newspaper works the same way for a tin. A white vinegar rinse is fine for glass and fine for silicone, but keep vinegar off metal finishes and off bamboo. Sunlight is the free option for glass: an hour outside, lid off, does more than another round of soap.
Step eight: Reassemble dry, label it, and store it properly. Gasket back in its channel, lid on loose if the canister is empty, and a label with the contents and the date. Keep filled canisters out of the dishwasher unless the maker says otherwise, keep glass that is freezer safe away from a hard freeze if it is filled to the rim, and remember that microwave safe applies to plain glass, never to a tin or a bamboo lid. Then check the seal once a month with the invert test, and replace gaskets before they fail rather than after.
The competition and why it lost
The containers that did not make this guide failed on cleaning, not on looks.
The hinged-lid cereal bin is the clearest example. The gasket sits inside the hinge assembly, and you cannot get it out without a screwdriver and a prayer. Cereal dust works into the hinge, the lid stops closing flat, and the seal goes. It is a fine bin for six months.
The mason jar with a two-piece screw band is close to ideal, except the band rusts. A rusty band is a bad seal and a worse look, and those lids are meant to be replaced, not inherited. The glass itself is the most forgiving material in this entire article.
The clamp-lid bale jar loses on the rubber ring. Those rings stretch, they are sold in odd sizes, and the wire clamp bends if a kid drops it. Great for dry pasta you eat in a month, less great for the flour you keep for six.
The plastic pop-top canister with the button latch is the one most people own. Flour dust packs into the latch, the button needs a fingernail to clean, and after two years of washing the plastic holds the smell of whatever was strongest in it.
The pretty stoneware crock with a wooden lid is the one I want to like. Wood moves with humidity and holds odor, and a crock that does not seal is decoration with a job title.
None of them are bad products. They are bad at the one thing this article is about, which is coming apart far enough to get clean.
What this all costs
Container money goes to one of three places: the body, the lid, and the labels. The four-canister tin set puts its money in the body and the finish, which is why it makes sense for flour and coffee where you buy in bulk and refill often. The 24-jar spice set puts its money in lids, labels, and accessories, which is why it makes sense for a drawer you are decanting once and labeling properly.
Check current Amazon price on both before you decide, because the gap between them moves, and the number that matters is not the sticker. It is cost per wash cycle.
The math I actually run: divide what you pay by the number of times you will wash the thing before a gasket fails. A tin canister washed every two weeks for five years is about 130 washes. If a replacement ring is cheap and easy to find, the container is still a bargain. If you cannot buy a replacement ring at all, the container's real life is the life of its gasket, and that is a short, annoying number.
The hidden cost is the contents. A failed seal on a jar of cumin turns a good spice into powder that tastes like dust, and a flour canister that takes on moisture is a bag of flour you throw out. That is the money the wash routine protects, and it is why learning to clean food canisters safely costs nothing but twenty minutes.
The rest of the budget is time. Eight steps, once a month for the big canisters and once a season for the spice jars. Food storage is one of the few categories where the maintenance is reliably cheaper than the replacement, and where a leak proof seal is a habit rather than a feature you paid for.